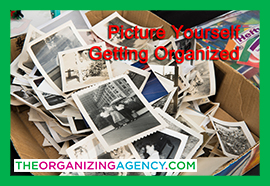
 In the age of the social media and smartphones, everyone’s a photographer. We snap, share, filter and tag photos every day, but we rarely stop to organize the shots that stack up on our devices, let alone the prints that are stuffed in envelopes, in drawers, in boxes… just waiting for you to take the time to sort them out. Well, now’s your time, and I’m here to help.
Whether you’ve got them on digital devices or you’ve got piles of prints cluttering your home or office, you’re going to need a plan to sort and store your photos. It can be a pretty big job, so you may want to divide it into stages. Once you’re ready to get started, make sure you’ve scheduled enough time to get it all done, or those piles will start growing again right where you left off.
In the beginning, digital cameras seemed like the ultimate answer to photo storage, but the simplicity of taking digital photos was soon replaced by hundreds – or thousands – of images being stored on your memory cards, phone or laptop. Maybe you think uploading your pics to Facebook or Instagram (or your social network of choice) is going to keep them safe, but scrolling through an enormous digital stash is not a fun or efficient way to peruse your keepsakes.
Uploading a picture to Facebook is not the same as storing your photos online!
If storage is all you’re looking for, there are tons of online options that will keep your photos safe and unburden your laptop or smart phone. Dropbox.com offers the first 2GB for free, and also allows you to share your files easily. Their stand out feature, Camera Upload, allows you to automatically upload your photos (and videos) from any device. If you want more photo specific functionality, the most popular websites include Shutterfly, PhotoBucket, and Google’s offering, Picasa. These sites, and others like them, offer free photo storage and a host of options for editing, sharing, and printing. Pay close attention when you sign up, and you’ll find there are always great offers for first-time users to get free prints and other goodies.
For some people, their photo-folly is that they have a closet full of photographs that have never been stored digitally. The first step is to sort through everything you have and delete the duds. You do not have to keep every shot you’ve taken, so let go of any guilt you have over “tossing out memories” while you’re letting go of duplicates, blurry shots, and the “nothing specials.” When you’ve got it down to the truly cherished memories, you can use a service like ScanmyPhotos.com, which will scan all your photos and return them to you along with a DVD. Money saving tip – if you sign up for their email list, you’ll be eligible for significant discounts and promotions.
Once you’ve whittled down your catalogue, and transferred everything to digital storage, it’s time to start creating albums. First decide how you want to organize them – chronologically or by category (wedding, vacation, family, birthdays). I recommend printing your albums at one of the previously mentioned websites or, if you’re a Mac person, like me, you can create them directly from iPhoto. Whichever service you use, it is fast and fun to drag and drop your photos into beautiful, fully-customizable albums. These printed photo books are thinner than traditional albums, so they’ll fit better on shelves, and they can be stored online for future printing to give as gifts.
If you’re old school and you prefer traditional albums, remember to only use nonmagnetic, acid-free, lignin-free and PVC-free pages, as all of these materials will decrease the lifespan of your photos. Acid-free plastic sleeves will deter cracking and yellowing, and labeling with an acid-free archival pen will also prevent damage. Whether you go with digital or print albums, be sure to record who is in each picture, where and when it was taken. This will make revisiting the photos more fun the next time around. Always store your photos and negatives away from light and heat sources, and avoid storing albums in the basement or on the closet floor so if there is ever a flood, your memories will be spared.
Now that you’re motivated to get those photos organized, don’t wait to get started! You don’t have to do it all at once, so if you’re feeling overwhelmed, begin with one box or one stack and go from there. You’ll have such a great time revisiting your memories, you’ll hardly notice the great work you’re doing getting organized, too.
Do you have a favorite product or method for keeping your photographic overflow in order? If so, please share it with us in the comments below.

